Adding and Adjusting Effects
- Select the track you wish to add an effect to.
- Open the track Inspector.
- Two panels labelled Insert Effects and Send Effects will appear. Tap one of your choice.
- Tap one of the slots and choose your desired effect from the list popping up to the right. Choosing None unloads the current effect (discarding all its parameters).
 Tap the On / Off button to enable / disable the effect.
Note: For send effects, this button will only toggle the send feed from this track to the effect. To toggle the effect itself, use the On / Off button in the Effect Rack.
Tap the On / Off button to enable / disable the effect.
Note: For send effects, this button will only toggle the send feed from this track to the effect. To toggle the effect itself, use the On / Off button in the Effect Rack.
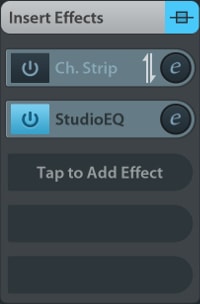
- Send: Adjust the mix using the blue fader. Affects the selected track only. Note: The first insert effect slot of every track is always a fixed StudioEQ effect.
 Tap the effects symbol to open the effect customization window.

Fixed Inserts
There are two insert effects hard-wired into each track for quick access, the Channel Strip and StudioEQ effect. You can swap their order by tapping the vertical arrow symbol.
 The order of the Channel Strip and StudioEQ effect can be swapped by tapping the vertical arrow icon.
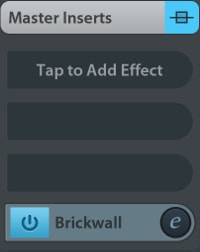
Master Inserts

To add master inserts, use the mixer.  Choose the symbol on the
Stereo Out channel and apply steps 4 and 5.
Choose the symbol on the
Stereo Out channel and apply steps 4 and 5.