Sample Editor
Double tap an audio event to enter the Sample Editor.
Miniature panel

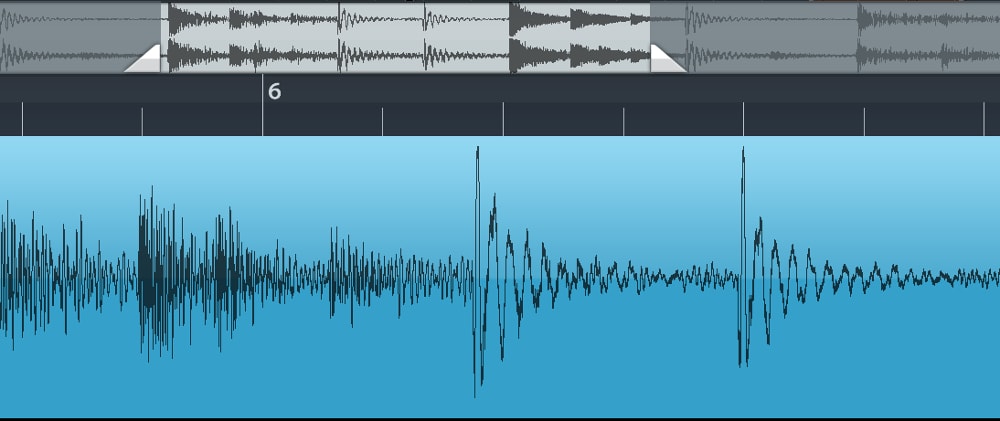
The top grey panel shows the entire waveform of your audio file. The marked region is displayed in the main window. Drag the left or right marker to zoom in / out and drag the region to adjust your view's position.
Ruler

Between the main and miniature panel lies the ruler, which includes a playhead and two selection locators. Use these to adjust the selection within your audio event, which is marked blue. Depending on the your current time display setting (in the transport panel), the ruler will either display time in seconds or bars / beats.
Editing stretched / transposed audio
Since time-stretching works non-destructively, the audio editor will show and play back every audio event in its original time scale without any time-stretching or pitch shifting applied.
 Play button
Sitting in the top left corner of the Sample Editor, the play button plays back the file that is currently being edited in the Sample Editor.
Tools
To the left, there is a list of tools available to manipulate your audio file:
 Select: By default, the area between the two selection locators is always selected. Tap the
Select option to select your whole Sample Editor view (the area between the top two markers).
Any of the processing tools below apply to the selected area.
 Trim: Erases all audio material around your selection.
 Erase: Erases all selected material.
 Reverse: Reverses the selected part of the audio event, which makes it sound backwards when played.
 Normalize: Normalizing a file will change its general volume by setting the peaks to 100% without clipping. If a quiet waveform has no high peaks, normalizing it increases its overall gain (volume) until its highest levels have reached their maximum.
 Fade: Fades your selection in or out.
- Use the split tool (available in the general Tools menu) to precisely split an event with the Sample Editor playhead.
 Save to Media
Saves the current audio event as a wave file in the MediaBay Audio directory. Use it to save changes in audio files, save new microphone recordings or make audio material available for use in other projects.
Saving to MediaBay writes the event's current tempo information into the resulting WAV file (iXML format).
Rename
Tap the event's name in the top left corner of the Sample Editor to bring up the rename dialog.
BPM button
On the right of the audio editor the audio file's tempo is displayed.
- If the audio file has no embedded tempo information (iXML), it will show the project's current tempo. Tap the button and enter the audio file's original tempo.
- Once the audio file has the correct information, you can sync it to the song's tempo with Time-stretch, using Auto mode. More detailed instructions here.